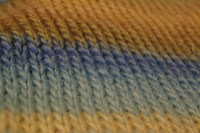

As you can see, the knit stitch looks like a bunch of little V's and the purl stitch looks like a bunch of -'s put together. I'm sure most of you have seen this when looking at sweaters.
We will build on our cast on row from the last tutorial. If you would like to try it at home, cast on ten stitches. Remember that the slip knot counts as one stitch. Honestly it doesn't matter how many stitches you cast on, ten just seemed like a good number. Below, the knit stitch is written out step by step and there is also a video that demonstrates how I do the knit stitch.
- Take the needle with the casted on stitches in your left hand and the empty needle in your right hand.
- Take the needle in your right hand and stick it into the back of the loop of the first stitch (The last stitch you casted on, it is the closest stitch to the needle's point.)
- Place the yarn that is connected to your unused yarn on top of the the part of the right needle that is sticking out of the cast on stitch so that the yarn is just covering the top half of the needle's circumference.
- Pull the right needle through the cast on stitch that you stuck it through in the second step pulling the yarn with it.
- Slide the cast on stitch off of the left needle.
- Now you have one stitch on the right needle and nine stitches on the left needle.
- Repeat steps one through five until the end of the row.
- After you have completed one row, your right needle has all of the stitches on it and your left needle is empty.
- Turn your work. This means that you take the needle in your right hand that has all of the stitches on it and turn it around so that the yarn that is connected to the ball is on the right side of the stitches. Now the empty needle will be in your right hand again.
- Repeating these steps will not yield a piece of fabric that looks like the ones in the pictures above. It will produce a fabric that looks like this:
- It is called the garter stitch. When you knit something (that isn't knit in the round, we'll talk about this later for those of you who don't know what I'm talking about.) you create the garter stitch. It looks like all purls usually, but the only stitch that is made is the knit stitch. It looks like this because even though you are only using the knit stitch, every time you knit on the other side, you are actually creating purls. Remember that part about only two stitches and the purl is the back of the knit stitch. This is where that comes in to play.
Here's a video I put together, hopefully it will help everyone who learns better from seeing an example than reading instructions.
I hope that helped. If you have any questions, comments, or suggestions for making this tutorial better or more user friendly, feel free to contact me at KnittingKel@gmail.com.


1 comment:
I noticed something strange about the post. When I was writing it, I used numbers for the steps, but now, when I look at it, it has bullets instead of numbers. I'm going to try to correct this later and figure out why it happened. Thanks!
Post a Comment